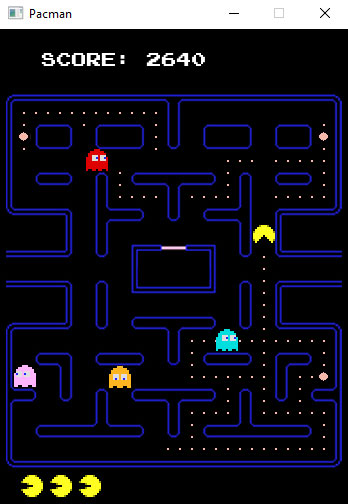
The start of my second year at university provided another opportunity to create a fully fledged program. I decided to stick with the theme of retro game clones and settled on what’s arguably the most well known arcade classic of all time, Pac-Man.
This program was completed in C# and like the my previous submission, Asteroids, used the SplashKit library for all the heavy lifting. To be completely honest I under estimated the difficulties I would encounter creating this game, an overview of the first hurdle is subsequently covered below.
Binding Pac-Man to the maze
The first major challenge I encountered was simply keeping the characters (Pac-Man & the ghosts) within the confines of the maze. My initial plan was to use collision detection, by placing the character within the maze and preventing it from moving through the walls.
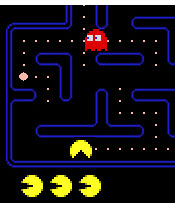
Sadly this was hit and miss. Sometimes it wasn’t detected until the character had already passed slightly into the wall, meaning the characters were misaligned in relation to the maze. Also by using collision detection, the player could still change directions where they were not permitted, as demonstrated in the image to the right.
With this in mind another approach would be needed which could define boundaries and also restrict the characters direction of movement. Therefore, I decided to implement a series of points where the character could pivot, these would be placed at each intersection and would define permissible directions.
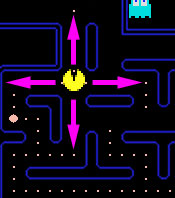
As per the scenario depicted in the image, the character passes over an intersection and is assigned permissible directions. This is held within an array within the character object, each position of the array representing a direction (ie Up, Down, Left, Right). When the player presses a direction button, only directions which are allowed are acted upon. The catch is once they’ve passed through the intersection this array needs to be updated again, otherwise the character could still traverse through the walls. To address this I came up with the idea of ‘pivot clusters’.
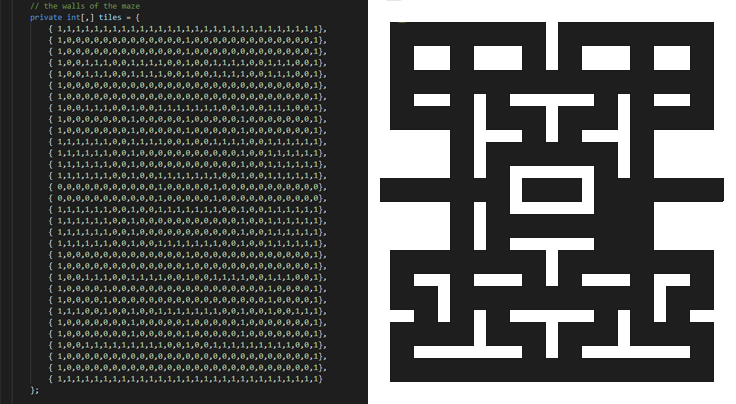
The maze, pellet positions and pivot points are all represented within 2 dimensional arrays. The CreateBoard function uses these arrays to build the game board, place pellets and define the boundaries via pivot points. As above, the tiles array depicts the maze with each position in the array representing a 24 x 24px tile, with 1’s used to represent the walls.
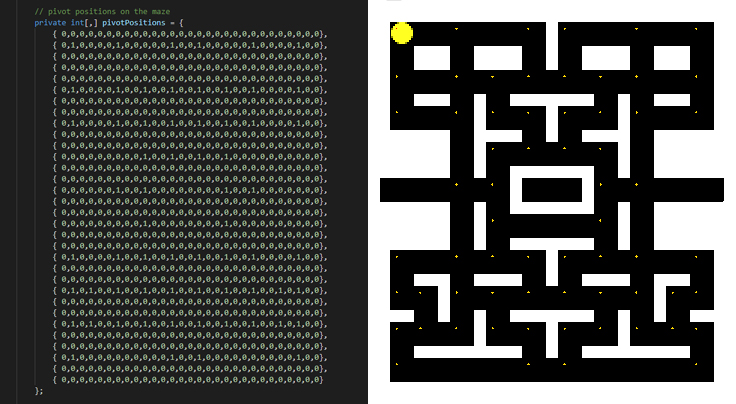
Intersections / pivot points are represented in the pivotPositions array. 1’s represent the tile that contains a pivot point. A function called createCluster found within the Gameboard class uses this array to create a ‘cluster’ of pivots. If you look closely above you can see a series of yellow pixels (a pivot cluster) at each intersection of the maze. And if you look even closer you’ll see a single red pixel on the upper left of Pac-Man’s sprite. This is the control point which is referenced to detect each individual pivot point. Each point contains permissible directions and these permission are applied to the character when its control point runs over them.
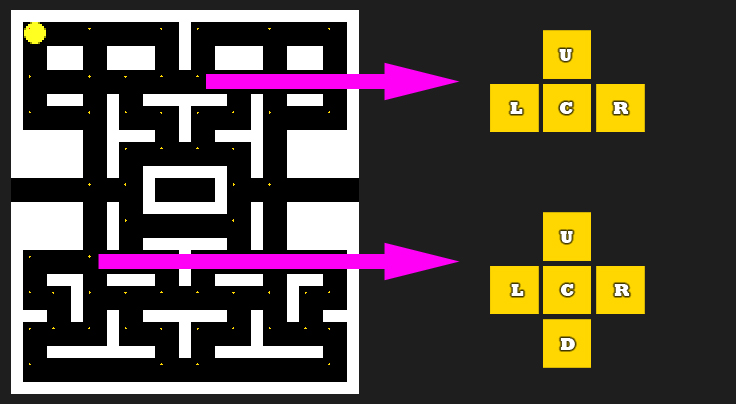
The createCluster function checks adjacent tiles to the pivot location to determine whether they’re a wall tile or not. So for instance, in the top example the function creates 4 pivot points in the cluster because the tile below the pivot location is a wall. In the bottom example it creates 5, as none of the adjacent tiles are walls. Function logic is quite simple, it creates the centre (C) pivot and assigns the relevant permissible directions, in the top example up, left and right. Whereas in the bottom, up, down, left and right. All other pivot points follow the same pattern outlined below and are obviously only added to the cluster if relevant.
| Pivot Location | Permissible Directions |
|---|---|
| Up (U) | Up & Down |
| Down (D) | Up & Down |
| Left (L) | Left & Right |
| Right (R) | Left & Right |
To clarify, take the top example and imagine Pac-Man is moving from left to right and encounters this cluster. The control point would initially cross over the left (L) pivot point (permitting left & right movement). It would then cross the centre (C) pivot, at which point the character could move in any direction except down. If the player chose to move up, the control point would then move over the up (U) pivot, whereby up and down movements are permitted.
With this in place, the characters are always limited to the bounds of the maze. This method also allows the ghost characters to navigate through the maze and also return to the centre box when eaten. Overall it was a fun, although time consuming and challenging project. In the end my hard work paid off with this project and my other assessments granting me my first perfect score for a unit!
The full source code can be found on my github account.